Python Virtual Environments – Why and How ?

You might have heard about Virtual Environments in Python already and may not be using it yet. Or you maybe aware of the advantages, but not sure how to set it up. In this post, we are trying to help you connect the dots.

Why you need Virtual Environments ? How to use it ? Let’s see..

Let’s take an example of 2 Python projects where you have the below requirements.

Project 1: Python version 2.7 and NumPy module version 1.17

Project 2: Python version 3.6 and NumPy module version 1.22 Read more

How you are going to achieve this ? And this is just 2 projects, of course you’ll be working on many projects and those will have their own requirements. Virtual Environments is the way..!

——————- advertisements ——————-

———————————————————

Think of Virtual Environments as a individual sections in a wardrobe. You are keeping your dresses in a partition, your spouse’s in a separate partition and kid’s items in another partition. Your kid is a Python project and his/her dresses are the modules/packages required for the project. The partition in wardrobe is the Virtual Environment containing only the required packages without messing with other project’s files. This helps in easy management, as you can have the required packages with respective versions in it’s own Virtual Environment without worrying about the other projects.

Working with Virtual Environments

You’ll need to install virtualenv (pip install virtualenv) if you are using Python 2.x. venv will be pre-installed in Python 3.x. (Let’s consider Python 3.x for the remaining examples)

python -m venv NewEnv

This command will create a New directory named NewEnv and it will have the subdirectories as below..

Scripts – This directory contains all the scripts including activate, deactivate, pip etc…

Include – C headers for the python packages

Lib – Contains the site-packages folder containing all the dependencies

Now you have created the environment. You have to activate the environment for using it. You’ll have the activate (batch) script inside the scripts folder.

C:\Users\bforum\test>NewEnv\Scripts\activate.bat
(NewEnv) C:\Users\bforum\test>

——————- advertisements ——————-

———————————————————

As you can see in the above example, we have run activation for NewEnv and the next line indicates we are in ‘NewEnv’.

When I do a pip list now, it is listing only pip and setup tools in this enviroment.

(NewEnv) C:\Users\bforum\test> pip list

Package Version
———- ——-
pip 19.2.3
setuptools 41.2.0

(NewEnv) C:\Users\bforum\test>

Now I can use pip install ModuleName==Version to install the specific version of modules in this environment. I just installed NumPy and Pandas (and their dependencies). Now the output looks like below.

(NewEnv) C:\Users\bforum\test> pip list

Package Version
————— ——-
numpy 1.22.0
pandas 1.4.1
pip 19.2.3
python-dateutil 2.8.2
pytz 2021.3
setuptools 41.2.0
six 1.16.0

(NewEnv) C:\Users\bforum\test>

——————- advertisements ——————-

———————————————————

You can deactivate the Virtual Environment to come out of it using deactivate (shell) script.

(NewEnv) C:\Users\bforum\test>NewEnv\Scripts\deactivate.bat

C:\Users\bforum\test>

That’s it in this post, hope this helped you. Comments section is open for any feedback/questions.

Getting familiar with Boto3 – AWS SDK for Python

Let’s discuss about Boto3, AWS Software Development Kit (SDK) for Python in this post. Boto3 enables you to perform most of the tasks in almost all the AWS services via Python scripts. For more details on the available services and actions, I would recommend you to refer the Boto3 documentation.

In this post we will have a brief introduction to the SDK including the installation and a few examples.

Installation

Yes, as you expected it is the pip install command. pip install boto3 will take care of the installation and if you want a specific version you can use the below syntax (where version is the required version 1.20.30 for example).

pip install boto3==version Read more

C:\Users\bforum>python -m pip install boto3
Collecting boto3
Downloading boto3-1.20.31-py3-none-any.whl (131 kB)
|████████████████████████████████| 131 kB 168 kB/s
Collecting botocore<1.24.0,>=1.23.31
Downloading botocore-1.23.31-py3-none-any.whl (8.5 MB)
|████████████████████████████████| 8.5 MB 726 kB/s


==== truncated output ====


Successfully installed boto3-1.20.31 botocore-1.23.31

Setting up Boto3 

Now that you have installed the module, you have import the same to your program. import boto3 would do it.

——————- advertisements ——————-

———————————————————

For accessing the AWS services, you have to allow the credentials for Boto3 to connect to the environment. You can have the shared credentials (key_id and secret for AWS access updated in the .aws/credentials file. If you are using an EC2 instance, you can use the IAM roles for accessing the AWS environment.

Not at all recommended, but here I am having my credentials inside my script itself.

Basic S3 tasks

aws_secret_access_key=’YOUR_ACCESS_KEY’
s3 = boto3.client(service_name=”s3″,aws_access_key_id=”test_key”,aws_secret_access_key=aws_secret_access_key)

You can replace the above line with just s3 = boto3.client(‘s3’) if you have your credentials defined in the file or is being taken care by IAM.

You can now invoke the below command to create an S3 bucket.

s3.create_bucket(Bucket=’bucket_name’) 

# Where bucket_name is the desired bucket name should be unique and must meeting the naming requirements (lowercase,numbers,periods and dashes only, having length of 3-63 characters etc…)

You will get an HTTP 200 response with bucket name and creation details.

Now let’s see how we can list S3 buckets.

s3 = boto3.client(‘s3’)
s3.list_buckets()

——————- advertisements ——————-

———————————————————

the above list_buckets command will list the existing buckets, but that will be HTTP response in JSON format. To filter only the names, let’s use the below commands (basically a for loop).

out = s3.list_buckets()
for bucket in out[‘Buckets’]:
   print(bucket[“Name”])

The output will be the bucket names as below

beginnersforum-bf1
beginnersforum-bf2
beginnersforum1crrs3

You can download a file from S3 using the below commands

bucket_name = ‘beginnersforum-bf1’
keyname = ‘Test Text file1.txt’
output_filename = ‘test1.txt’
s3.download_file(bucket_name, keyname, output_filename)

Few EC2 examples

ec2 = boto3.client(‘ec2’) #will create an EC2 client which can be used in the upcoming commands. 

start an instance : ec2.start_instances(InstanceIds=[instance_id])

Reboot an instance : ec2.reboot_instances(InstanceIds=[‘Instance_ID’])

Shutdown an instance : ec2.stop_instances(InstanceIds=[instance_id])

That was just a very basic intro to this Python module. Based on your need, you may refer to the specific service and action details in the SDK documentation. Hope this post helped you in understanding the module, please feel free to have your thoughts/feedback in the comments section.

Machine Learning / Artificial Intelligence – basic pre-requisites to get started

Machine Learning or Artificial Intelligence technologies are booming (or should I say boooooming..!!) nowadays, maybe already. Many of you are planning to get started with your AI or ML studies, but not clear on where to start and what are the pre-requisites. Yes, a bit different area from your current Infrastructure/Software/Database/Coding domain and which requires a bit (not really, a lot more) of additional learning.
Let’s try to take a look at the most common pre-requisites for getting started with your AI/ML journey.
 

Read more

Mathematics
Maths, but how much of maths ?? 
Not too much, it is basically a refresh required for your high-school maths. You just have to remember linear algebra (linear equations, matrices and vectors) stuff and basics of calculus (rate of change, integration, differentiation etc…). Remember, it is required for you to understand how the models work. You do not have to do all these calculations etc… by your own, or you do not have to code all these in maths terms. The model will do it, maths is for you to understand what is happening in the back-end. 
——————- advertisements ——————-

———————————————————

Statistics and Probability 

It’s a lot to learn, if you are not too good in it. You should be having a good level of statistics knowledge to understand the AI/ML stuff, as the basics are all based on the statistics terms. 
You should be well versed with the descriptive statistics including the mean, median, standard deviation, variance etc… of the data. Same applies with the Probability theory. You have to be too good with it, able to understand the data distribution including distribution functions PDF (Probability Density Function) and CDF (Cumulative Density Function) (and PMF etc…).
——————- advertisements ——————-

———————————————————

Histograms and other common plotting – visualisation – methods, a better understanding of data (covariance, correlation etc…).

The more statistics you know the better you can understand. 
 
Programming
Is it necessary to know coding ??
I would say, yes. There are MLaaS (Machine Learning as a Service) tools which will do the most part for you where you don’t have to write a single line of code. But I would prefer coding it yourself for a better understanding and that maybe necessary based on your job role.
Python – is where everyone gets landed, based on its popularity and it being Machine Learning friendly (just kidding, it has rich set of modules available for ML). If you are good at R, C/C++, Java, Julia, Scala, Ruby… still you are at a better position, 1 item (programming) is already checked.
——————- advertisements ——————-

———————————————————

 
Useful links
Let’s me add it soon…
 
I believe that covers the basic requirements to get started with your ML/AI learning. The more you work with data, the better you would be with it. It requires a lot, lot of learning and even more practice. Please feel free to add your suggestions/queries in the comments section.

Update service-now ticket using a Python script

How cool it will be if you can upload the output of your script in to Service now incident notes or task notes automatically. This python script helps you to run set of command against the Cisco switches and routers and the output of command will upload to service now incident automatically. This will help you to increase the response time of NOC L1  team in troubleshooting task.

Service-now a IT Service management (ITSM) tool based on cloud platform provides end to end transformation of IT services. Service Now provides REST API to communicate with SNOW instance. We will use REST API in our program to interact with service now instance.

We are explaining step by step procedure to achieve this

Following are the components required: Read more

  1. Service now developer account
    2. Service now instance
    3. Python with Service now API installed

——————- advertisements ——————-

———————————————————-

Create service now developer account and instance

Please refer our post ‘Create service now developer account and instance’ and create new user for API calls.

Setup environment

We would  require ‘netmiko’ package to take ssh of devices. Please read part 1 and part 2  of our post for details about installing python and running your first program. Please read part 4 if you want to know how to take SSH of a switch.

Install python service-now API package

We also require ‘pysnow’ package which is using to interact with service now using REST API call. Please click here if you would like to know more about ‘pysnow’ package.

Install ‘psysnow’ using following command

‘pip install psynow’

please click here if you did not know how to install a package on python using pip

Script Definition:

The script will get service-now information and device credential initially. Then it will continuously run on server so user can update multiple incident by running the commands against multiple devices. All the required commands have to be saved on ‘command.txt’ file.

——————- advertisements ——————-

———————————————————-

It is using class ‘inc_update’ to gather information and update service-now.  Inside the class, the function ‘collectdata’ using to SSH to device and taking the out put of commands.  The function ‘inc_update’ using to update service now instance with the output.

Following are the script. It is easy to understand, and we have put inline comments for making it easy.

import pysnow
import getpass
from netmiko import ConnectHandler

print “=============================\n”
print “Program to update service now incident notes\n”
print “\n=============================\n”

##class to connect device
class cls_incident:
#initialising variables
def __init__(self,uname,password):
#initialising variables
self.uname = uname
self.password = password
self.secret=password
self.dev_type=’cisco_ios’
self.ip=”
self.output=”

——————- advertisements ——————-

———————————————————-

#creating dictionery for netmiko
self.dict_device = {
‘device_type’: self.dev_type,
‘ip’: self.ip,
‘username’: self.uname,
‘password’: self.password,
‘secret’: self.secret,
‘global_delay_factor’:1,

}

#function to login to device and collect output of command
def collectdata(self,ipaddress):
self.dict_device[‘ip’]=ipaddress
self.net_connect = ConnectHandler(**self.dict_device)
#opening command file
cmd_file=open(‘command.txt’)
self.output=”
#loop for reading command one by one
for line in cmd_file:
cmd=line.lstrip()
self.output+=”\nOutput of command “+cmd+” \n”
self.output+=self.net_connect.send_command(cmd)
cmd_file.close()

——————- advertisements ——————-

———————————————————-

print self.output
print “\nCommand Output collected”

#function to update service now
def inc_update(self,inc_number,s_uname,s_password,s_instance):
#connecting with service now
snow = pysnow.Client(instance=s_instance, user=s_uname, password=s_password)
incident = snow.resource(api_path=’/table/incident’)
#payload=self.output
update = {‘work_notes’:self.output, ‘state’: 5}
#updating incident record
updated_record = incident.update(query={‘number’:inc_number}, payload=update)
print “Incident note updated ”

def main():

#Collecting service now details
instance=raw_input(“Enter service now instant name in format of ‘company.service-now.com’ :”)

——————- advertisements ——————-

———————————————————-

instance=instance.rstrip(‘.service-now.com’)
s_uname=raw_input(“Enter service now user name:”)
s_password=getpass.getpass(“Password:”)

##Collecting device credential
dev_uname=raw_input(“\nEnter Device user name :”)
dev_passwd=getpass.getpass(“Password:”)

objDev=cls_incident(dev_uname,dev_passwd)

while True:
try:
inc_number=raw_input(“Enter incident number :”)
ip_address=raw_input(“Enter IP address of device:”)
print “Connecting device and collecting data ”
#creating class object
objDev.collectdata(ip_address)

print (“Updating service now”)
#updaing service nw
objDev.inc_update(inc_number,s_uname,s_password,instance)
print “\nThis program will keep on running, press ctrl C to exit”
print “Enter details for next incident \n”
except Exception,e:
print “Error on execution :”,e
if __name__== “__main__”:
main()

——————- advertisements ——————-

———————————————————-

How to run :

Download the ‘command.txt‘ and ‘incident-update.txt‘ in to same folder of your system. rename ‘incident-update.txt’ in to ‘incident-update.py’. Open the file ‘command.txt’ and add your required commands which need to be run on networking device.. Run the program from command prompt using ‘ python incident-update.py’ . Please provide your input and test . Please ensure you have the reach-ability to service-now instance and network devices from your machine.

Program screen shot

——————- advertisements ——————-

———————————————————-

Service-now screen shot

You could see service now incident notes updated with command output automatically

Hope this will ease your life a bit.. 🙂

Please comment below if you would require customized script based on your requirement which will support multiple device model like Cisco ASA, Juniper, Palo Alto, Checkpoint etc.

Network Automation using Python – Part VII – SSL certificate status validation and alert configuration

Python SSL Certificate Checker 

Continuing our Networking Automation using Python blog series, here is the Part 7.

In this part we are explaining python script which will check the expiry date of a SSL certificate from a list of IP address and send an e-mail automatically if the certificate expiry date is nearing. The IP addresses can be of your load balancer VIP or Server IP address or any device IP address. You can use same script to check SSL certificate for any port number like 443,587,993,995,465 etc.

Basic Requirements Read more

  1. Python 3.6
  2. server_ip.txt , a text file which contains all device IP address
  3. A email account on www.outlook.com . You can use any other mail account by editing SMTP server detail on the script. Please let us know if you want customised script which will sent mail from your corporate mail account or Microsoft Outlook.

Please read part 1 and part 2 to get started with python and how to run your first program.

This script have two files

  1. server_ip.txt -> this file store all the device IP address
  2. sslcheck.py -> This is the python script

——————- advertisements ——————-

———————————————————-

How to run :

Step 1. Download the sslcheck and server_ip to the same folder

Step 2. Change the sslcheck.txt to sslcheck.py

Step 3. Open server_ip.txt and save with all your device IP address with port number whose SSL certificate need to be check.

Step 4. Open command prompt “CMD” and navigate to the folder where you have saved script and ‘server_ip.txt’

Step 5. Run script by typing “python sslcheck.py”  on command prompt

Step 6.It will ask for threshold date, from mail id , to mail id and credentials. Please provide the same

Step 7. Script will go though each device SSL certificate and sent mail if anything going to expire within given number of days.


Script Details

import ssl
from datetime import datetime
import pytz
import OpenSSL
import socket
import getpass
from datetime import timedelta
import smtplib
from email.mime.multipart import MIMEMultipart
from email.mime.text import MIMEText

——————- advertisements ——————-

———————————————————-

print(“Program to check SSL certificate validity \n”)
##opening file
ipfile=open(‘server_ip.txt’)
cur_date = datetime.utcnow()
mailbody=””
expcount=0

##getting details
expday=input(“Please provide threshold expiry date :”)
from_mail=input(“Your mail id : “)
passwd=getpass.getpass(“password : “)
to_mail=input(“Target mail id : “)
##checking certificate validity. for loop to go through each IP in server_ip.txt file

for ip in ipfile:
try:
host = ip.strip().split(“:”)[0]
port = ip.strip().split(“:”)[1]
print(“\nChecking certifcate for server “,host)
ctx = OpenSSL.SSL.Context(ssl.PROTOCOL_TLSv1)
s = socket.socket(socket.AF_INET, socket.SOCK_STREAM)
s.connect((host, int(port)))
cnx = OpenSSL.SSL.Connection(ctx, s)
cnx.set_connect_state()
cnx.do_handshake()
cert=cnx.get_peer_certificate()
s.close()
server_name = cert.get_subject().commonName
print (server_name)

——————- advertisements ——————-

———————————————————-

##checking expiry date
edate=cert.get_notAfter()
edate=edate.decode()

##converting in to system time format
exp_date = datetime.strptime(edate,’%Y%m%d%H%M%SZ’)
days_to_expire = int((exp_date – cur_date).days)
print(“day to expire”,days_to_expire)
##preparing mail body
if days_to_expire < int(expday) :
expcount=expcount+1
mailbody=mailbody+”\n Server name =”+server_name+”, Days to expire:”+str(days_to_expire)

except:
print (“error on connection to Server,”,host)
print (mailbody)

#sending mail if any certificate going to expire within threshold days
if expcount >= 1 :
try:
print(“\nCertifcate alert for “+str(expcount)+” Servers,Sending mails”)

body=”Following certificate going to expire, please take action \n”+mailbody
s = smtplib.SMTP(host=’smtp-mail.outlook.com’, port=587) # change here if you want to use other smtp server
s.starttls()
s.login(from_mail,passwd)

——————- advertisements ——————-

———————————————————-

msg = MIMEMultipart() # create a message
msg[‘From’]=from_mail
msg[‘To’]=to_mail
msg[‘Subject’]=”Certificate Expire alert”
# add in the message body
msg.attach(MIMEText(str(body),’plain’))

# send the message via the server set up earlier.
s.send_message(msg)
print(“Mail sent”)
s.close()
except:
print (“Sending mail failed”)
else :
print(“All certificate are below the threshold date”)

print (‘\nCert check completed’)


Sample Output 

Below images are sample script and a sample e-mail alert.

——————- advertisements ——————-

———————————————————-

Sample e-mail alert

Hope this post helped you. You can read more posts on Network automation using Python here. Please use the comments section for any queries/suggestions .

Reference :

https://www.python.org/

http://www.tutorialspoint.com/python/ 

Network Automation using Python – Part VI – Automatic backup of multiple switches

Python Backup Script


Continuing our Networking Automation using Python blog series, here is the Part 6.

Here we are explaining a simple script to take the backup of multiple Cisco switches/routers quickly. You can schedule the script using crone or job scheduler so it will automatically take daily backup without your intervention. The script will take the output of ‘sh run’ and save to the file. The file name would be  device IP address + today’s date .

Please read part 1 and part 2 to get started with python and to run your first program. Please read part 4 for detailed steps on how to take an SSH session of a switch.

Read more

The script have two files

  1. ipfile.txt -> this file store all the device IP address
  2. autobackup.py -> This is the python script

How to run :

Step 1. Download the autobackup and iplist to the same folder

Step 2. Change the autobackup.txt to autobackup-cisco.py

Step 3. Open iplist.txt and save with all your device IP address which need to be backed up.

——————- advertisements ——————-

———————————————————-

Step 4. Open command prompt “CMD” and navigate to the folder where you have saved script and ‘iplist.txt’

Step 5. Run script by typing “python autobackup-cisco.py”  on command prompt

Step 6. You can see the backup of device on same folder with the filename device IP address+ date

——————- advertisements ——————-

———————————————————-

Sample screenshot below.

Hope this post helped you.

You can read more posts on Network automation using Python here. Please use the comments section for any queries/suggestions .

Reference :

https://www.tutorialspoint.com/python

https://www.python.org/

Network Automation using Python – Part V – running a set of commands on Cisco switches

Python Script to run set of commands

Continuing our Networking Automation using Python blog series, here is the Part 5.

This post details about an all-in-one script which will helps you to execute series of commands in multiple switches. This script can be utilized by peoples who does not have much idea in scripting. We have made this task in three file to simplify the operation so that you don’t have to change the script every time .

Please read part 1 and part 2 for details about installing python and running your first program. Please read part 4 if you want to know how to take SSH of a switch.

Read more

File details :
  1. Configuration file-> This file include all the configuration commands need to be executed on remote switches. The name of the file is ‘configfile.txt’
  2. IP File -> This file contains IP address of all the devices, file named ‘ipfile.txt’
  3. Script file -> This files contains python script to execute commands specified on configuration file on all devices. (filename here is ‘configcommand.py’)

For example , if i need to update ACL 101 which is  applied to outside interface of all routers, follow the below steps.

——————- advertisements ——————-

———————————————————-

Step 1. Open your ‘configfile.txt’ and add following commands

config terminal
access-list 101 permit ip 10.1.1.0 0.0.0.255 172.16.1.0 0.0.0.255
end
write

Step 2. Open ‘iplist.txt’ and add all your router IP address

Step 3. Open command prompt and give following command to execute

cmd->python configcommand.py


Working : 

The script will login to the first device whose IP address mentioned in ‘ipfile.txt’ and execute all the commands given in ‘configfile.txt’ file. Once it is done, the script will login to the next IP address and execute all the commands. The process will continue until the last IP address on the ‘ipfile.txt’ fetch and execute.

——————- advertisements ——————-

———————————————————-

You can use the same script to execute any kind of command like SNMP modification, interface configuration etc. All you just want to edit ‘configfile.txt’ and no need to edit the script file.


Complete Script – Download

Click below links to  download script (to SSH to a device and run multiple commands) and other file  Please change the file extension from .txt to .py for executing directly.

Script- configcommand

Configfile –configfile

iplist.txt –iplist

Also, keeping a copy here in this post below.

——————- advertisements ——————-

———————————————————-

from netmiko import ConnectHandler
import getpass,sys,time

device = {
‘device_type’: ‘cisco_ios’,
‘ip’: ‘192.168.43.10’,
‘username’: ‘username’,
‘password’: ‘password’,
‘secret’:’password’
}
ipfile=open(“iplist.txt”)
print (“Script for SSH to device, Please enter your credential”)
device[‘username’]=input(“User name “)
device[‘password’]=getpass.getpass()
device[‘secret’]=input(“Enter enable password: “)
configfile=open(“configfile.txt”)
configset=configfile.read()
configfile.close()

for line in ipfile:

device[‘ip’]=line.strip(“\n”)
print(“\n\nConnecting Device “,line)
net_connect = ConnectHandler(**device)
net_connect.enable()
time.sleep(2)
print (“Passing configuration set “)
net_connect.send_config_set(configset)
print (“Device Conigured “)

ipfile.close()

Hope you enjoyed reading. You can read more posts on Network automation using Python here. Please use the comments section for any queries/suggestions .

Reference :

https://www.python.org/

https://www.tutorialspoint.com/python

Network Automation using Python – Part IV – SSH to Cisco Device

SSH Cisco Device

Continuing our Networking Automation using Python blog series, here is the Part 4.

We had explained the ways to take a Telnet session to the Switches in our previous posts. Now here we are explaining the steps to SSH to Cisco switch using Python script and to configure IP on vlan interface. IP configuration is an example here, once you have SSH’ed to the switch, you can perform any other configuration as per your requirement, by just modifying the script a bit. Please read part 1 and part 2 to get an idea about how to install python and run your first program.

We are using netmiko module for taking SSH session of device.

What is Netmiko ?

Read more

Netmiko is open-source Python library that simplifies SSH management to network devices. This is a common and easy to use library as netmiko supporting multi vendor devices.You can read more about netmiko from here . Following are the some of the vendor devices supported by Netmiko .

——————- advertisements ——————-

———————————————————-

Arista vEOS
Cisco ASA
Cisco IOS
Cisco IOS-XR
Cisco NX-OS
Cisco SG300
HP Comware7

Cisco IOS-XE
HP ProCurve
Juniper Junos
Linux

How to install Netmiko

Netmiko package not available by default. You should have netmiko library installed on your machine .Following are the steps to download and install netmiko in Python 3.6

Step 1. Working internet connection and Python 3.6 installed on machine

Step 2. On command prompt, type following command, this will automatically fetch netmiko from internet and install on your machine

“python -m pip install netmiko”

——————- advertisements ——————-

———————————————————-

Following are the steps to start with netmiko on your script

Import netmiko to your Script

Use the following command to import netmiko package to your script

from netmiko import ConnectHandler

Create Device template 

We have to create device template using python dictionary data type.

device= {
‘device_type’: ‘cisco_ios’,
‘ip’: ‘10.10.10.10’,
‘username’: ‘admin’,
‘password’: ‘Beginnersforum’,
‘port’ : 22,
‘secret’: ‘enablepassword’# optional, replace with your enable password ”
}

——————- advertisements ——————-

———————————————————-

where,

device->This is name of template, you can give any name like cisco_2960,juniper_sw etc

‘device_type’ -> Here we are specifying the type of device we are taking ssh,

secret -> Here we are giving the enable password

Port and secret are optional here and the default value for port is 22.

Establish an SSH connection to the device

We are establishing SSH connection to device by passing the above defined template

ssh_connect = ConnectHandler (**cisco_switch)

Run Show command 

Here the ‘show ip int brief” command will execute on remote device and output will store to ‘result” variable. We can print “result” to see the output on window

result = ssh_connect.send_command(show ip int brief) print(result)

——————- advertisements ——————-

———————————————————-

Sample output :

Interface IP-Address OK? Method Status Protocol
FastEthernet0 unassigned YES unset down down
FastEthernet1 unassigned YES unset down down
FastEthernet2 10.10.10.10 YES manual up up
Vlan1 unassigned YES unset down down

Complete Script – Download

You can download script (to SSH to a device and add IP address to vlan 10) from here. Please change the file extension from .txt to .py for executing directly.

Also, keeping a copy here in this post below.

from netmiko import ConnectHandler
import getpass
import sys

#create device template

device = {
‘device_type’: ‘cisco_ios’,
‘ip’: ‘192.168.43.10’,
‘username’: ‘username’,
‘password’: ‘password’,
‘secret’:’password’
}

#Getting the user credential

print (“Script for SSH to device, Please enter your credential”)
device[‘username’]=input(“User name “)
device[‘password’]=getpass.getpass()
device[‘secret’]=input(“Enter enable password”)

#Establishing SSH connection
ssh_connect = ConnectHandler(**device)

#changing to enable mode
ssh_connect.enable()
ssh_connect.send_command(‘config t’)
ssh_connect.send_command(‘int vlan 10’)
ssh_connect.send_command(‘ip add 10.10.10.1 255.255.255.0)
ssh_connect.send_command(‘end’)
ssh_connect.send_command(‘write’)
ssh_connect.disconnect()

Hope you enjoyed reading. You can read more posts on Network automation using Python here. Please use the comments section for any queries/suggestions .

Reference :

https://www.tutorialspoint.com/python

https://www.python.org/

Network Automation using Python – Part II – Telnet to a Switch and IP configuration

This is the 2nd post from my Networking Automation using Python blog series.

As part of network automation, the first thing is accessing (Telnet -ing) a switch. Here is a simple program explaining step by step way to access Cisco switch using telnet and to configure IP address on Vlan interface – all using Python.

Please check out our first post Network Automation using Python – Part I for getting started with Python. We have explained the basics of Python and the installation procedure in the previous post.

“telnetlib” module

Read more

“telnetlib” is the name of module which is supporting to take the telnet of device. This will be automatically installed as part of your python installation

->Import telnet library

The first step is to import telnet library to our script , use the following command

“import telnetlib”

->Connecting a Host

To connect a device using telnetlib, use following command.

tn=telnetlib.Telnet(HOST)

——————- advertisements ——————-

———————————————————-

Where HOST is the variable which is having the IP address of device and “tn” is the           variable name which is creating virtual telnet link with your device. It could be any name as you wish ( like telnet or tnet) .You should use same name for the rest of the             operation on the device.

-> Writing  command to to Host

tn.write(“config t”)

The write() function using to deliver command to device. The above example will write       “config t”  command on the device telnet prompt.

-> Reading output from host

output=tn.read_all()

read_all() function will read the output of command from device and store in to the variable output

That concludes the basics for initiating a telnet session to the switch.

Following are the step by step guidelines to access the switch and then configure the IP on the switch. The steps explained below is based on 2.6 version for easy understanding. I have attached version 3.6 and 2.6 script also as there are changes in the script. The main difference in 3.6 as we need to convert all values in to ASCII before sending to device.

Step 1. Importing the required modules

import telnetlib

import getpass

import time

“getpass” is the module to read the password without printing on screen

“time” will be using to control the flow of program by pausing script certain duration

——————- advertisements ——————-

———————————————————-

Step 2. Initialise the Host Variable

The “Host” variable holding the IP address of Device . We can assign the IP address as follows. Please understa

HOST=”192.168.43.10″

Step 3. Read the user name and password

user = raw_input(“Enter your telnet username: “)
password = getpass.getpass()

raw_input() is an in built function used to read data giving by user and assigning to a variable. Here it will display “Enter your telnet username” on the screen and read the username provided by user and assign to variable called user. After executing those lines, we will have username on “user” variable and password on “password” variable.

Step 4. Connect to device and supply username and password

tn = telnetlib.Telnet(HOST)

tn.read_until(“Username: “)

tn.write(user + “\n”)

if password:

tn.read_until(“Password: “)

tn.write(password + “\n”)

tn = telnetlib.Telnet(Host)    // This command will initiate a telnet session to the given IP address on background .

tn.read_until(b”Username: “)    // This will be used to read output from device until it is asking for ‘Username’

tn.write(user + “\n”)   // This will supply the username to the telnet console followed by enter key. “\n” using to provide enter key.

——————- advertisements ——————-

———————————————————-

Step 5. Configure the device

In this step, we will be delivering configuration command to device one by one

tn.write(“enable\n”)    // changing to enable mode
tn.write(“cisco\n”)      // providing enable password
tn.write(“conf t\n”)     //moving to configuration mode
tn.write(“int vlan 10 \n”)   // changing to vlan 10 interface
tn.write(“ip address 1.1.1.1 255.255.255.255\n”)  // Assigning the IP address
tn.write(“end\n”)    //ending the configuration
tn.write(“exit\n”)

We have delivered all commands using write() function. You can use same write function to deliver the command as per your requirement. Save and Execute the script using RUN . Please refer part 1 if you don’d know how to write and execute script.

Script download

You can download the script for version 2.6, here

You can download the script for version 3.6, here


So, that’s it. Hope this helped you. You can read more posts on Network automation using Python here. Please use the comments section for your queries/comments.

Reference :

http://www.python.org/

www.tutorialspoint.com/python

Network Automation using Python – Part I – Python basics

Network Automation using Python

We are starting with series of posts which will help you to automate your networking tasks using Python. This is a step by step guide which will show how to install Python and start your first program. You do not require any programming skill to start with automation. Please keep watching  on upcoming posts to understand better.

What is Python

Python is a general-purpose interpreted, interactive, object-oriented, and high-level programming language. It was created by Guido van Rossum during 1985- 1990. Like Perl, Python source code is also available under the GNU General Public License (GPL). This tutorial gives understanding how to install python one Windows machine and make it ready for Network Automation programming. Here in this post I will be covering only essential parts to start with Python so that we can continue with the network automation things in the coming posts. Please follow https://www.tutorialspoint.com/python/index.htm for more on basic/advanced python training.

Read more

Download Python

Download python from following link. You can either download 2.7 version or latest 3.6 version.Here we are showing 3.6 version since this is the latest and our all automation scripts are based on 3.6 version.

https://www.python.org/downloads/

Install Python.

Double click on the downloaded exe file and proceed with next until it gets installed.Leave all values default.

——————- advertisements ——————-

———————————————————-

Accessing Python.

Once it is installed, it will be available in  program list.

Click on Start-All Programs-Python 3.6  and click on IDLE .IDLE is the name of IDE for Python scripting .

Writing your first Program:

Once you have clicked IDLE, you will be available with following window.

To start with new program , click file -> New file. This will open new window where you can start coding.Here we will write a program to print Hello World . You can directly start coding from first line on wards as  python does not require any ‘main’ or ‘initialization’ statements for simple programs.

——————- advertisements ——————-

———————————————————-

Save the program

Click file and Save to save the program . The program will be saving with .py extension

Run the program.

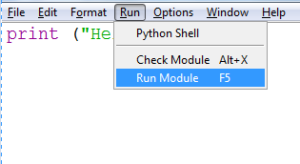
Python does not require any compilation before running program as python is an interpreter program. To run the program , Select Run and click on Run Module

The result of the program will available on the first window. (Shell window)

——————- advertisements ——————-

———————————————————-

Accessing program from command line.

You can use following method to run the script which is created earlier or given by someone else. To run the program from command line, open CMD and navigate to the folder where your script has been saved .Type python and after that script file name on CMD. This will run the script and provide the out put on command prompt.

Hope you got the idea how to install Python and run your first program. Please click here for more posts from this series. Please use the comments section in case if you have any queries.

Reference:

https://www.tutorialspoint.com/python

https://www.python.org/